Thursday, May 25, 2017

Peterborough's Newest Pollinator Garden

Wow, a while since I've updated this!  ... 4 and half years!

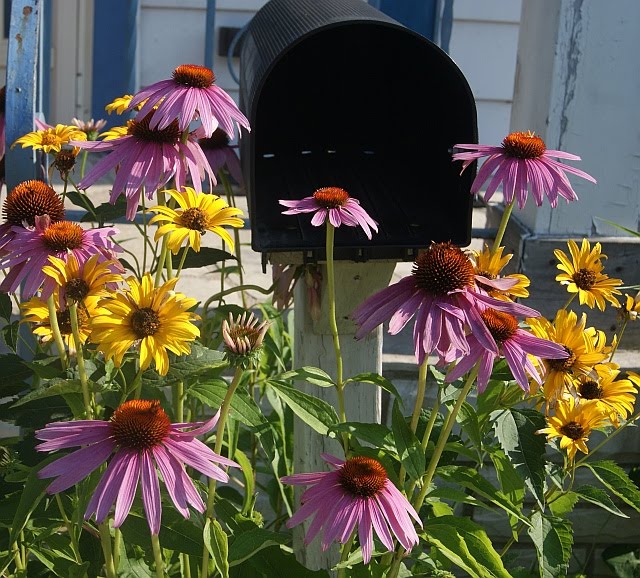
Last year I joined a group called Peterborough Pollinators and helped started 2 pollinator gardens.  I also began putting in more pollinator plants in the gardens in front of my house -- which I expanded to include the boulevard.

2016 was a very dry summer. We gave up mowing the boulevard -- and I harvested lots of yarrow (for medicinal use as well as a bittering agent in artisan brewing).

Yesterday I helped put in a community pollinator garden on Pinewood.  Each ward in Peterborough got participatory budget funding for pollinator gardens and this is the first one we put in. The crew was led by Helene Denis and included myself, Drew Monkman, Janis, and Marcy (our designer) from Peterborough Pollinators, and well as Kim Zippel and several Pinewood community members.

Monday, October 1, 2012

To Market... To Market

... and bring home:  a quarter-bushel of Empire apples, a quarter-bushel of Spartan apples, a quarter-bushel of Roma tomatoes,  10 lbs of red onions, a 1 kg jar of local honey, and some grass-fed skirt steak.

Only two more outdoor Saturdays for our local market.  Then the vendors decrease in number as the market moves indoors.

Southern Ontario had a freak frost during apple blossom time, so apples are twice or more what they were last year and year before.  I paid $15 for my half-bushel of C-grade apples.  I'll sort through to store the best ones for a while.  The others will go into the food dehydrator and canned apple sauce.  I'm eating fresh too while I have them.  But I'll keep a close eye on the "keepers" to bake/dehydrate those that start to go right away.

Honey prices keep escalating.  The jar I bought should nicely supplement my souvenir jars from places we visit (tupelo from Florida,  sourwood from the Great Smokey Mountains,  southwester wild flower from New Mexico).

I bought the tomatoes because I wanted to dehydrate some,  have some on hand for hot sauce (I have very hot peppers fermenting right now), and some to eat fresh.

About a third of the red onions will be dehydrated,  a third used in salsa and relish, and a third used in daily cooking (as long as they last in  my warmish basement storage).

I think I'm nearing "ready for winter".

Friday, September 21, 2012

There's A Hole In the Bucket...

... actually it's a whole set of cracks, the handle-holding spot broke, and so I spilled my gathered produce as I dodged the ladder set by my back gate...

The bucket is plastic, of course, and it's been out in the sun and weather for more than a few seasons.  It originally held muffin batter, I think (the label is all worn off).

Anyway, the old bucket went into our plastic recycling -- and I picked up four much newer buckets of a similar size on the neighborhood boulevard.  They have metal bails and originally held drywall compound -- much sturdier!

I also brought home three glass jars for hold dried foods,  a former olive oil bottle whose dark green glass will perfectly hold a Christmas gift of fermented hot pepper sauce,  a Windex spray bottle, a 2.5 gallon water jug (it has a spout that comes off) for emergency water storage,  a gallon metal tin, and a shoebox sized filing box (with label holder).

I'm all for reuse over recycling!

Friday, September 14, 2012

Hot Mustard Relish

I came home after a week away to find all sorts of things ready to use in the garden: hot red peppers, cucumbers, tomatillos, zucchini, green beans. I made a batch of mustard pickles with red pepper and onions I had on hand with freshly gathered green beans, cucumbers, and tomatillos.

We liked the flavor of the mustard sauce so much, I decided to throw together a mustard relish heated by some of the hot red peppers.

Hot Mustard Relish Makes 9-11 half pint jars.
2-4 hot red peppers (even more if your peppers are somewhat mild or you like it really hot!) with seeds and membrane removed
2 sweet red peppers
1 sweet green pepper
6-8 tomatillos
6-8 cucumbers (if seedy, remove seeds)
3 cups chopped onions (3-4 med - to - large onions)
1/4 cup flour
2 tablespoons mustard powder
1/3 cup organic sugar (or light brown sugar)
4-6 teaspoons pickling salt (to taste)
1/2 teaspoon ground turmeric
1 1/2 teaspoon ground ginger
1 1/4 cup white vinegar

I ran all the vegetables through my food processor. Add more tomatillos and cucumbers if needed to get a final quantity of a generous 8 cups. Taste for heat as you add the hot peppers and they blend through the vegetable mix. It is far easier to add more peppers than cope with a relish that is too hot!

Prepare your jars and lids. In a large stainless steel saucepan, combine the spices, sugar, salt, flour, and vinegar. Cook until thickened. Add the processed vegetables -- you may want to keep back some of your hot peppers so you can adjust the heat. Simmer gently for about five minutes to blend flavors and develop the relish's heat.

Ladle into hot jars, leaving a generous 1/2 inch head space. Process in a hot water bath for 15 minutes.


Wednesday, September 12, 2012

Tomato Stock

This is a pantry basic for me. I fire-roast my tomatoes and drain off liquid (see my post on passata) from them to make it. It certainly cuts down the boiling-down time to produce tomato sauce! I usually produce 1 pint of tomato stock for every 2 pints of tomato sauce (this is still some boiling down) I put up.

You can refrigerate the drained liquid for several days if you're accumlating it from several small batches of sauce making.

Recipe for Tomato Stock

12 cups of drained tomato liquid
2-3 cloves of garlic
1/2 c fresh basil
1 small onion, cut up
1-2 stalks of celery, cut up
1/2 c parsley
other herbs to taste: tarragon, hot pepper, oregano
Bottled lemon juice or citric acid for jars

Put 1 cup of the liquid in the blender. Add the seasoning ingredients. Puree.

Put the rest of the liquid into a pot. Add the seasoning puree. Salt to taste. Prepare your jars as you heat the stock to boiling; you can simmer it for 5 to 10 to develop flavours for your tasting and adjusting.

For each pint jar, use one tablespoon of lemon juice or 1/4 teaspoon of citric acid for acidification (double amount for quart jars). Pour stock into jars, seal, and process 35 minutes for pints, 40 minutes for quarts.

Monday, September 10, 2012

Fire-Roasted Passata


Passata from its Italian name: passata di pomodoro, when tomatoes have been "passed" through a sieve to remove seeds and lumps.


I bought a bottle of Del Monte passata this summer and really enjoyed its versatility and "closer to fresh" taste. Unadorned in the bottle, it combines well with any kind of pesto to make a sauce for pizza or pasta. It is thicker than tomato juice or canned tomatoes but not as thick as tomato paste.

Most home processing of tomatoes requires a boiling off of tomatoes to thicken their consistency for sauce. I use a method that involves fire-roasting, drainage, and passing through an Italian-type tomato press to remove the liquid.

Equipment: grill (with cover), tongs, large colander, bowl of sufficient size to hold the colander, masher (optional), spoon for scooping, pot or bowl for pulp transfer if you can't set your sieving device next to your draining setup, Italian tomato press (a large food mill would also work but is more effort), container to hold strained pulp.

Tomatoes and their washing: I use Roma tomatoes for all my preserving. I can obtain a bushel at a time from local grocers or the farmers market in my area. A quarter bushel will yield 6 to 8 pints of passata and 2-3 pints of tomato stock -- yield depends on tomato size and dryness (due to the season's weather). Ripe Romas make the best passata. They also roast quickly and pass through your sieving device easily. I wash the tomatoes in cool water to which I've added a tablespoon or two of vinegar. This will kill mold spores and bacteria on the tomatoes in case you have hold any of the steps over night.

Fire-roasting: I do this on a gas grill. It can be done on a charcoal grill as well -- I imagine there would be more "fire flavour" in the result. You can also roast tomatoes in the oven, but it's too hot where I live to do at the time of tomato harvest. I roast the tomatoes under cover until they are lightly browned on both sides or until they soften and begin to bubble a bit. You don't want them so soft that they fall apart as you lift them from the grill.

Draining: Put the tomatoes in a colander over a bowl. You want them to cool before putting them through your sieving device anyway. If properly cooked, they will flatten on themselves and begin to release some of their juice. Stir to promote this; mashing also helps. I let one batch drain while I load my grill with the next batch.

Sieving: Once the roasted tomatoes have reduced in volume by a quarter to a third, spoon into your sieving device or the vessel to transfer the pulp to your sieving device. Your device will take out the seeds and skins (which can be composted) and leave you with an unseasoned puree of sauce consistency.

Don't throw out the juice you drained. It makes a wonderful gazpacho base or canned tomato stock for winter soups.

Processing: Once you've sieved all your tomatoes, measure the puree to determine how many jars you'll need. Prepare them and heat the puree just to boiling. Put a tablespoon of bottled lemon juice in each pint jar (double it for quarts), fill with puree with at least a half inch head space. Process pints for 35 minutes, quarts for 40.

Saturday, September 8, 2012

Orangey Canned Beets


I bought beets because I want them for winter. I also wanted them with an orangey flavour. This was going to be easy to do because I have dried orange peel and some orange oil. I thought caraway would be nice too and I threw in some green peppercorns for a bit of a bit.


Recipe for Orangey Canned Beets

8 cups cooked, peeled, sliced beets
3 cups white vinegar
2/3 c water
1/2 c organic sugar (more if you really have a sweet tooth)
1 tablespoon dried orange peel
2 tablespoons caraway seeds
2 teaspoons green peppercorns
a few drops of orange oil if you have (to taste)

Put your peel, caraway and peppercorns in a large tea ball or a cheese cloth bag. Place in pot with the vinegar, water, and sugar. Bring to a boil and simmer for 15 minutes (prepare your jars while doing this). Add orange oil to taste if using.

Take out the spices and add the beets to the vinegar brew. Bring to a boil. Put in jars, leaving at least 1/2 inch headspace once topped up with brew. For pints, process 30 minutes. I had quarts, so I processed 35.